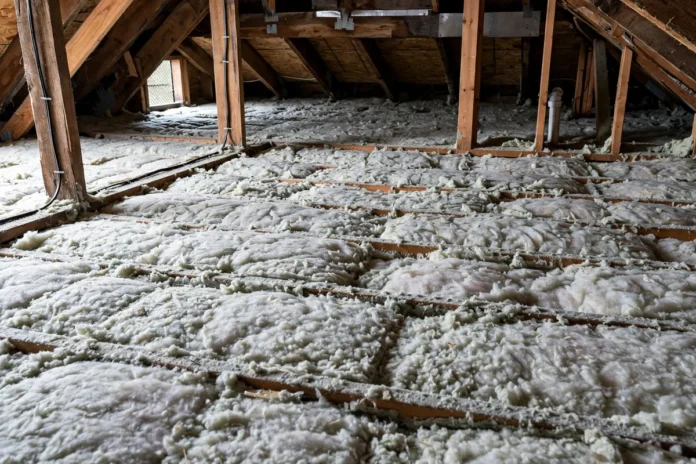
Warm air rises — which makes the attic the most important insulation location in the house. Heat escaping through the ceiling ends up there, and from there it is gone. An under-insulated attic shows itself in winter: cold ceilings, rooms that never warm up, ice along the roof edge while neighbours’ roofs stay clear.
The good news: it is easy to check. A tape measure, flashlight and dust mask are enough, and the check takes about fifteen minutes. This guide explains how to measure what is there, judge it against common targets, spot the warning signs, and compare the main types.

Why the Attic Loses the Most Heat
Heat moves from warm spaces to cold ones, and in winter the biggest temperature gap in most homes is between the top-floor ceiling and the unheated attic above it. Warm air also rises and leaks through gaps around light fittings, hatches, pipes and wiring.
So the attic is a double problem: insulation slows heat through the ceiling, but leaks carry it around the insulation. Both are fixable — and the attic floor is usually the cheapest, easiest place to add insulation. It is the same envelope principle behind fixing drafty windows before winter, on a larger scale.
How to Check Your Current Insulation Safely
Work on a cool morning — attics overheat even in autumn sun. Wear a dust mask or respirator, gloves, long sleeves and eye protection; insulation fibres irritate skin and lungs. Bring a flashlight. Step only on joists or boards laid across them, never on the ceiling material between joists, which will not hold weight.
The check itself has three parts:
- Look at the coverage. Insulation should be level and continuous to the outer edges. Bare patches and material pushed aside for storage are common.
- Compare it with the joists. If insulation sits below the top of the joists, more is almost certainly needed. If it buries the joists, depth is probably reasonable — measuring confirms it.
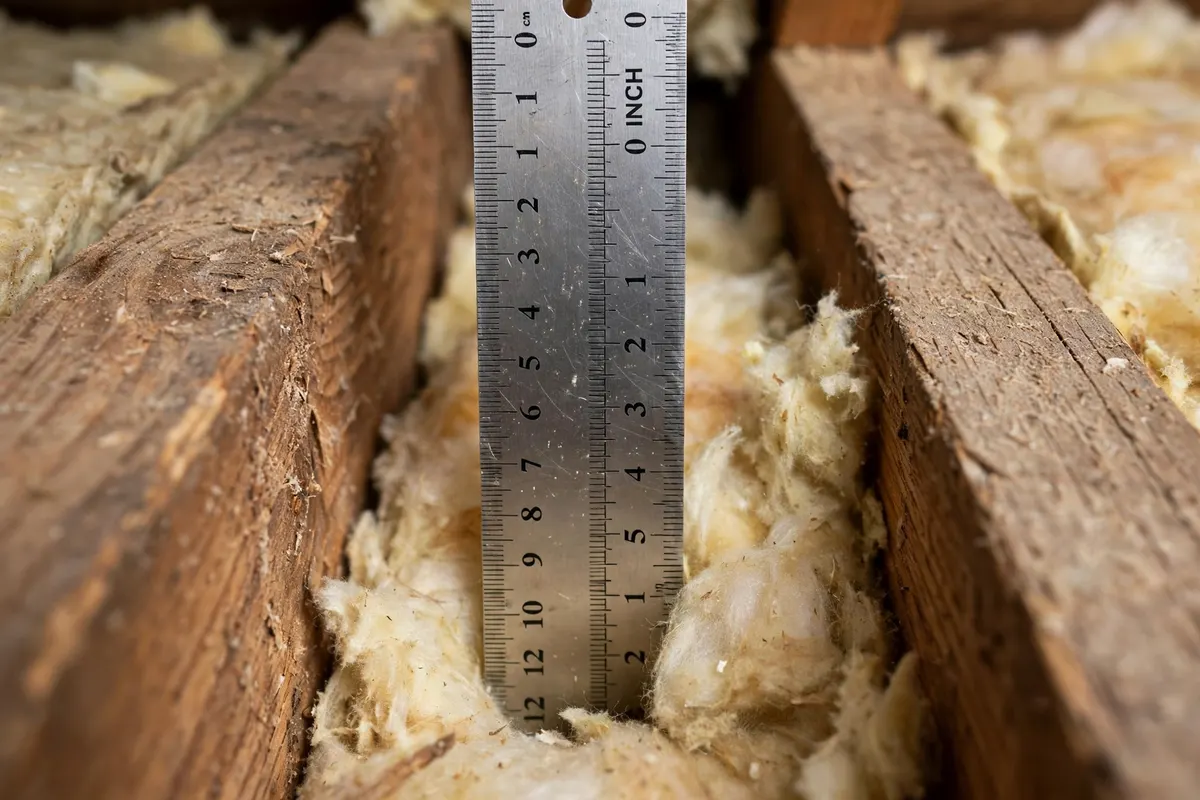
- Measure the depth. Push a ruler through the insulation to the ceiling below, in three or four spots including near the eaves. Insulation settles, so older attics often measure less than was installed.
Turning Depth Into a Rough R-Value
Insulation performance is measured in R-value — resistance to heat flow; higher is better. Depth alone is not the whole story, because materials deliver different R-values per inch:
- Fiberglass batts and blankets: about R-3 to R-3.5 per inch
- Blown-in fiberglass: roughly R-2.2 to R-2.7 per inch
- Blown-in cellulose: roughly R-3.2 to R-3.8 per inch
Ten inches of fiberglass batts, for example, works out to roughly R-30 to R-35.
For context, US Department of Energy guidance for colder climates commonly targets around R-38 to R-49, with milder targets further south. Treat these as general guidance, not code — but a useful yardstick: five or six inches of fiberglass falls well short almost anywhere with a real winter. Local codes and rebate programs may set their own figures.
Signs the Attic Does Not Have Enough
Sometimes the house announces the problem before anyone climbs into the attic:
- Visible joists through thin insulation, or insulation level with or below them
- Uneven snow melt — bare patches while snow stays on neighbouring roofs
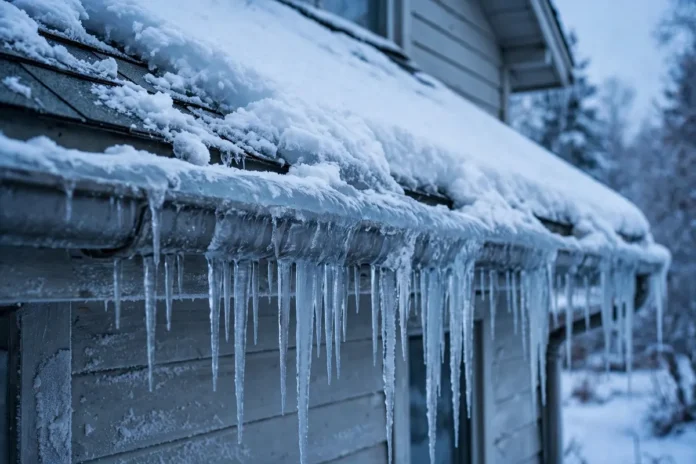
- Ice dams and heavy icicles along the eaves
- Cold ceilings that feel cold to the touch on winter mornings
- Uneven rooms — upstairs noticeably colder than downstairs despite the system running
- High heating bills compared with past winters
Any one is a reason to measure; two or more make topping up one of the highest-return jobs on the winter list, alongside the broader winterize your home checklist tasks.
Comparing the Main Insulation Types
Fiberglass batts are the familiar pre-cut rolls. Widely available and cheap, they are DIY-friendly: they unroll between joists, and a second layer laid across the joists reduces thermal bridging. Their weakness is fit — gaps around pipes and wires leak performance, and compressing them reduces R-value.
Blown-in insulation — fiberglass or cellulose — is loose material distributed by machine. It fills awkward shapes and tops up existing insulation evenly, including over joists. Cellulose, made largely from recycled paper with fire retardant, performs slightly better per inch. Contractors usually do this work, though some stores rent blowing machines. It settles, so installers apply it slightly deep.
Spray foam is the premium option. It insulates and air-seals in one step, with the highest R-value per inch, but it is usually applied under the roof, not on the floor — a bigger, pricier decision, and a professional-only job. For a straightforward floor top-up, batts or blown-in are the practical choices; foam earns its cost for cathedral ceilings or ductwork that must come inside the thermal envelope.
Prices vary too much by region to quote: batts are cheapest per R-value added, blown-in is mid-range, foam costs several times more. Local quotes pin down real numbers.
Air Sealing: The Step People Skip
Adding insulation over a leaky ceiling is like a thicker blanket over a draught — leaks bypass insulation entirely. The worst are predictable: the hatch, recessed lights, pipe and wiring penetrations, flue chases, and wall tops.
Seal these first, with caulk, rated foam sealant or rigid covers, keeping proper clearances and high-temperature sealant around flues. Insulate and weatherstrip the hatch too — an uninsulated hatch behaves like a hole in the ceiling. Sealing first also keeps moist air out of the cold attic, where it can condense and cause damage.
Do Not Block Ventilation: Baffles Matter
An attic needs airflow too. Eaves (soffit) vents let air travel up to ridge vents, keeping the roof deck cold in winter — helping prevent ice dams — and carrying moisture away. Insulation pushed into the eaves blocks that path.
Baffles — foam or plastic channels stapled between rafters at the eaves — hold an air channel open above the insulation while letting material reach the outer wall line. Any top-up job should check existing baffles are present and unobstructed.
DIY or Professional?
Topping up an accessible attic with batts suits a careful DIYer; blown-in top-ups are possible with rented equipment and a helper. Professionals earn their cost when the attic is cramped, old insulation needs removing, extensive sealing is required, or the home has any complication below. Either way, measuring first means quotes can be judged against facts, not guesswork.
Safety Notes Before Adding Anything
- Recessed lights: Older can lights cannot be buried unless they carry an IC (insulation contact) rating. Covering a non-IC fitting is a fire risk; use IC-rated covers or keep the specified clearance.
- Knob-and-tube wiring: Found in some older homes, it must not be covered with insulation. An electrician should assess it first; in many areas it must be replaced before insulating.
- Flues and chimneys: Keep insulation clear of hot flues by the code-required distance, with metal barriers where specified.
- Suspect material: Very old loose fill resembling grey-brown pellets could be vermiculite, which sometimes contained asbestos. Do not disturb it; get a professional assessment.
- Protective gear: Mask or respirator, gloves, goggles and covered skin for every attic trip, plus care around protruding roofing nails overhead.
Quick Decision Checklist
- ☐ Measure insulation depth in three or four places
- ☐ Identify the material type and estimate its R-value per inch
- ☐ Compare against general targets (around R-38 to R-49 in cold climates)
- ☐ Check coverage is even and reaches the edges, with no bare patches
- ☐ Look for ice dams, cold ceilings or uneven snow melt as extra evidence
- ☐ Plan air sealing (hatch, penetrations, light fittings) before adding material
- ☐ Confirm baffles keep eaves ventilation open
- ☐ Screen for safety issues: non-IC lights, knob-and-tube wiring, suspect old fill
- ☐ Decide DIY or contractor; get quotes based on measured facts
Frequently Asked Questions
How deep should attic insulation be?
It depends on the material. Reaching R-38 to R-49 — common cold-climate targets in US Department of Energy guidance — takes roughly 12 to 16 inches of blown insulation, or 11 to 14 inches of batts.
Can new insulation be installed over old insulation?
Usually yes, if the old material is dry and sound. Lay new batts unfaced and perpendicular to the joists so moisture is not trapped. Wet or damaged material should be removed first, and the cause fixed.
What is the difference between insulation and air sealing?
Insulation slows heat conducting through materials; air sealing stops warm air leaking through gaps. An attic needs both — sealing first is what lets insulation perform to its rating.
Do ice dams always mean the insulation is bad?
Not always. Ice dams mean heat is reaching the roof, but air leaks are often a bigger cause than thin insulation, and ventilation plays a part. The fix combines all three.
Is spray foam worth it for an attic?
Rarely for a simple top-up — batts or blown-in reach the same R-value for far less. Foam earns its premium where air-sealing and high R-value per inch solve a specific problem, like cathedral ceilings.
When is the best time of year to add attic insulation?
Late summer and autumn: the work is done before heating season and the attic is still tolerable. Spring works too; summer attics can be dangerously hot.